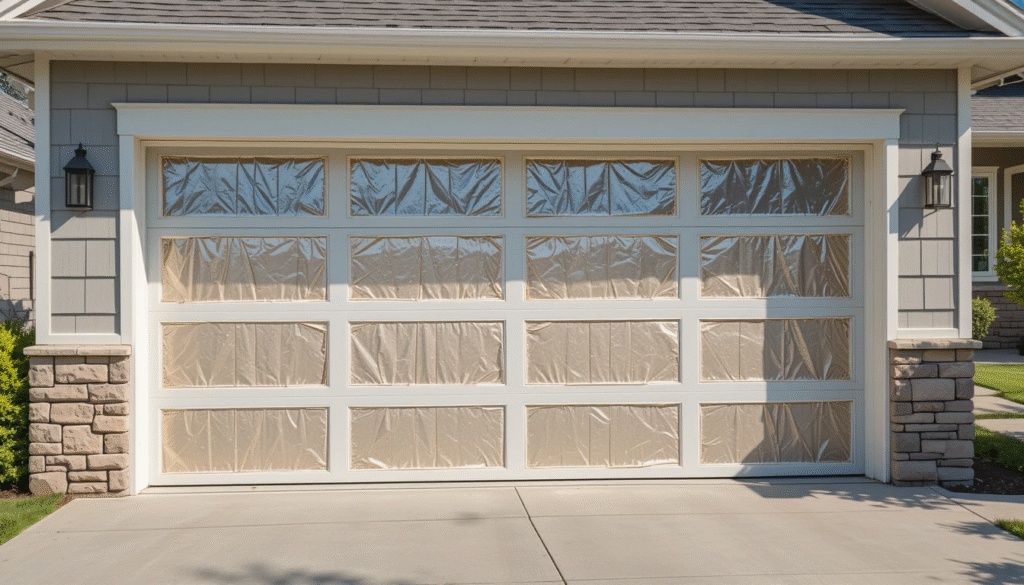
If your garage feels like an oven in summer and an icebox in winter, you’re not alone. Many homeowners overlook garage door insulation, not realizing how much it can improve comfort, energy efficiency, and even noise control.
An uninsulated garage door is like a giant hole in your home’s thermal envelope, letting heat escape in the winter and seep in during the summer. The good news? With the right approach, you can transform your garage into a more comfortable and functional space year-round.
In this guide, we’ll explore the benefits, types, and installation methods for insulating your garage door so you can make the best choice for your home.
Why Garage Door Insulation Matters
Insulating your garage door isn’t just about keeping warm; it’s about creating a better overall environment. Here’s why it’s worth the investment:
- Temperature Control : Reduce extreme heat and cold for a more stable indoor temperature.
- Lower Energy Bills : Minimize heat transfer between your garage and living spaces.
- Noise Reduction : Cut down on street and driveway noise entering your home.
- Durability & Strength : Insulation adds rigidity, making your door more resistant to dents.
For homes with bedrooms or offices above the garage, insulated garage doors can make a huge difference in comfort and energy savings.
Types of Garage Door Insulation
When choosing the best garage door insulation, you’ll find several materials and methods, each with pros and cons.
1. Reflective Garage Door Insulation
- Made with aluminum foil layers and a foam or bubble core.
- Works best in hot climates by reflecting radiant heat.
- Lightweight and easy to install with a DIY garage door insulation kit.
2. Foam Board Panels
- Also known as garage door insulation panels.
- Rigid panels made of polystyrene or polyurethane.
- Provide a high garage door insulation R-value for their thickness.
3. Batt Insulation
- Fiberglass batts fitted into garage door panels.
- Affordable, but requires a protective facing to prevent irritation.
4. Spray Foam Insulation
- Expands to fill gaps and provide a tight seal.
- Usually part of a professional insulated garage door installation.
Understanding Garage Door Insulation R-Value
The R-value measures how well insulation resists heat flow the higher the R-value, the better the performance.
- R-6 to R-9 – Suitable for mild climates.
- R-10 to R-13 – Good for moderate climates.
- R-14+ – Ideal for very hot or cold regions.
If you’re replacing your door, consider a factory-made insulated garage door with a high R-value for maximum efficiency.
DIY vs. Professional Installation
You have two main options for adding insulation:
DIY Garage Door Insulation
Using a garage door insulation kit is cost-effective and relatively simple:
- Kits usually include pre-cut reflective panels, fasteners, and instructions.
- Installation can be done in a few hours with basic tools.
- Best for homeowners comfortable with small projects.
Professional Insulated Garage Door Installation
- Offers perfect fitting, higher-quality materials, and long-term durability.
- Ideal if you’re replacing an old door or want maximum performance.
- Can include custom garage insulated door designs for aesthetics.
Step-by-Step: How to Install Garage Door Insulation (DIY)
If you’re ready to tackle the project yourself, here’s a quick guide:
- Measure Your Panels : Record the width and height of each door section.
- Cut Insulation to Size : Use a utility knife for clean edges.
- Attach Fasteners : Stick adhesive fasteners inside each panel.
- Insert Insulation : Gently press panels or reflective material into place.
- Secure & Seal : Ensure tight edges to avoid air gaps.
Pro Tip: For metal doors, consider reflective garage door insulation to help with both heat reflection and winter warmth.
Choosing the Best Garage Door Insulation for Your Home
Your decision will depend on:
- Climate : Hot climates benefit from reflective insulation; cold climates from foam boards.
- Budget :Kits are cheaper; professional insulated doors cost more upfront but last longer.
- Garage Use : If your garage is a workshop, gym, or living space, invest in higher R-value materials.
Example: If you live in a snowy climate and use your garage as a home gym, foam board panels with an R-12 rating will keep temperatures stable and comfortable year-round.
Cost Considerations
- DIY kits: $50–$200 depending on material and size.
- Professional installation: $500–$1,500 for retrofitting insulation.
- New insulated garage door: $800–$3,500 depending on style, R-value, and materials.
While the upfront cost may seem high, the energy savings and comfort improvements can pay off within a few years.
Maintenance Tips for Insulated Garage Doors
Once your garage insulated door is installed, a little upkeep will extend its life:
- Inspect seals regularly for cracks or gaps.
- Keep tracks and rollers clean and lubricated.
- Check for moisture buildup in humid climates.
Summary: Upgrade Your Garage, Upgrade Your Home
Adding garage door insulation is one of the simplest, most effective ways to make your home more energy-efficient, comfortable, and quiet. Whether you choose a DIY garage door insulation kit or hire a pro for a full insulated garage door installation, you’ll enjoy year-round benefits: lower energy bills, reduced noise, and a more usable space.
With the right materials, be it reflective garage door insulation, foam panels, or a new garage insulated door your garage can become an extension of your living space rather than a seasonal storage area.
Thinking about upgrading? Start by measuring your garage door, comparing garage door insulation panels and R-values, and deciding between DIY and professional installation. Your warmer, quieter, more efficient garage is just a project away.
if you want to read about the Cape Cod Style Home Kit click here


